Custom Rendering
This function allows users to Render a series of Shots into one video.
Start a Custom Render
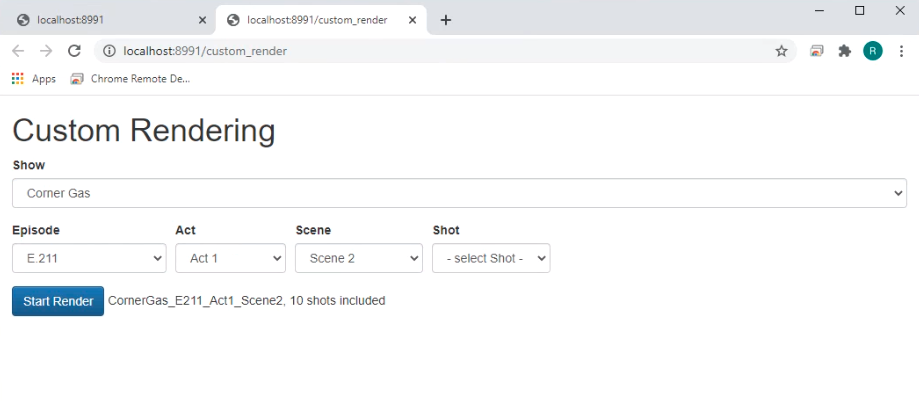
On the Renderman Page, click the "Custom Render" button to open the Rendering Page.

On the Custom Render page:
- Choose a Show from the drop-down menu.
- Select an Episode or instead pick an Act, Scene, or a Shot to include less Shots.
- Click the "Start Render" button.
Render Options
When only one Shot is included in the custom rendering, there is an extra option available:
Codec
There are four options in the Codec drop-down menu that change the quality of the render:
Preview
Generates preview videos of Shots.
Online
There is no compression in this mode of rendering of Shots, resulting in final product quality. Codec: DNxHD Profile: dnxhr_444 Pixel format: yuv444p
Offline
Similar to online rendering, but the quality is 1080p and meant for test purposes.
Apha Channel
Online quality with Alpha Channel for later compositing.
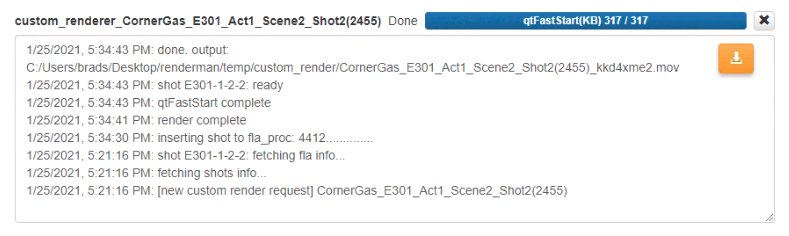
Render Result
When the Custom Render starts, the main page will add a new process for this render. Once rendering is complete, a "Download" button will appear in the right corner in order to download the video to the location of your choice.
When the export is complete, you can access the files in the "showexport/_the_show_code" folder inside Renderman workspace.